実機を使ってマニピュレーション技術を学ぼう(1)- 環境セットアップ編

やりたいこと
ロボットのコア技術であるマニピュレーション技術(主に認識とプランニング)を安価な実機を動かしながら学んでいく。
タスクとしては、様々な対象物を認識して、物を把持したり、置いたりする。
仕様実機
環境センサ
ロボットアーム
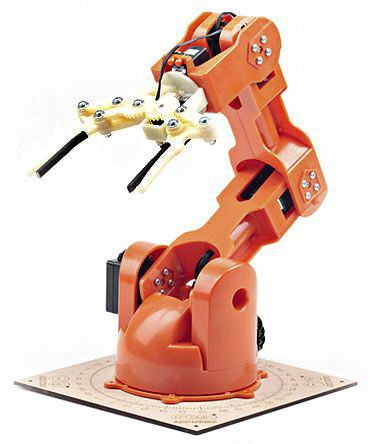
- Braccio: Tinkerkit Braccio robot
想定OS/ミドルウェア
Ubuntu16.04
ROS Kinetic
- ROS2も触り始めたい...
今回のテーマ
- ロボットアームBraccioの環境設定
今回必要なもの
Arduino Uno
Braccio一式
Arduinoのセッティング
以下を参照。とてもわかり易いです。ありがとうございます!
Braccioのセッティング
ソフト
GitHub - arduino-org/arduino-library-braccio: Arduino Braccio LibraryからGit clone
cloneした内容を~/arduino-1.8.9/libraries/にコピー
arduinoを起動
左上のFile->Examples->Braccio->testBraccio90を選択し書き込み
ハード
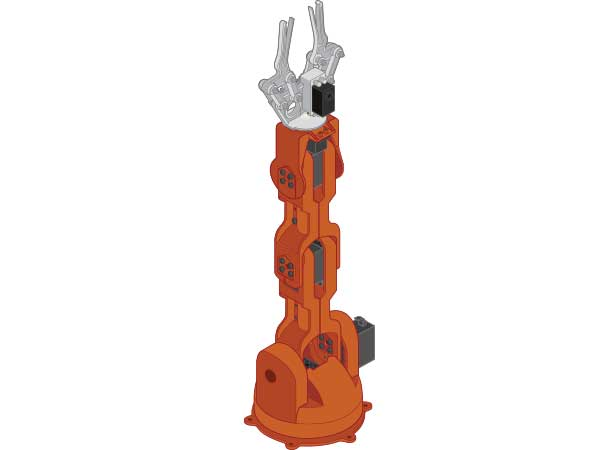
説明書を見ながら頑張って組み立てる笑。以下動画がおすすめ。とても簡単。
アライメント
BraccioのシールドをUnoに挿して電源接続。
Unoのリセットボタンを押すと先程のtestBraccio90が走る。理想状態は以下の写真。

ズレていたら以下のように最終行を書き換えて修正し、初期値のズレを計測(メモ)しておく。
 /*
  testBraccio90.ino

 testBraccio90 is a setup sketch to check the alignment of all the servo motors
 This is the first sketch you need to run on Braccio
 When you start this sketch Braccio will be positioned perpendicular to the base
 If you can't see the Braccio in this exact position you need to reallign the servo motors position

 Created on 18 Nov 2015
 by Andrea Martino

 This example is in the public domain.
 */

#include <Braccio.h>
#include <Servo.h>


Servo base;
Servo shoulder;
Servo elbow;
Servo wrist_rot;
Servo wrist_ver;
Servo gripper;

void setup() {
  //Initialization functions and set up the initial position for Braccio
  //All the servo motors will be positioned in the "safety" position:
  //Base (M1):90 degrees
  //Shoulder (M2): 45 degrees
  //Elbow (M3): 180 degrees
  //Wrist vertical (M4): 180 degrees
  //Wrist rotation (M5): 90 degrees
  //gripper (M6): 10 degrees
  Braccio.begin();
}

void loop() {
  /*
   Step Delay: a milliseconds delay between the movement of each servo.  Allowed values from 10 to 30 msec.
   M1=base degrees. Allowed values from 0 to 180 degrees
   M2=shoulder degrees. Allowed values from 15 to 165 degrees
   M3=elbow degrees. Allowed values from 0 to 180 degrees
   M4=wrist vertical degrees. Allowed values from 0 to 180 degrees
   M5=wrist rotation degrees. Allowed values from 0 to 180 degrees
   M6=gripper degrees. Allowed values from 10 to 73 degrees. 10: the toungue is open, 73: the gripper is closed.
  */

  // the arm is aligned upwards  and the gripper is closed
                     //(step delay, M1, M2, M3, M4, M5, M6);
  // Braccio.ServoMovement(20,         95, 90, 90, 90, 90,  73);  // ここを以下のように書き換え
  Braccio.ServoMovement(20,         95, 95, 98, 95, 86,  73);


}
以上で簡単なBraccioのセットアップは完了。
テスト動作
exampleプログラムのtakethespongeを書き込み
- arduino editorを開いて左上のFile->Examples->Braccio->takethespongeを選択
実行すると、こんな感じ↓
まずは机に置いたゴミを勝手に捨ててくれる感じのアプリ作ろうかな pic.twitter.com/NuWCLplG8R
— Robonchu@Boston (@robonchu) May 12, 2019
- 色はスプレーで塗装してます
次回
- ROS x MoveIt! でモーションプランをする予定。

所感
$200+αで家でいろんな実験ができるのはいい感じ。きれいに色塗るの難かしい...
最終的に机の上を自律で片付けるくらいまでまとめれたらいいな。